Until the invention of power tools (arguably in the late 1890s) hand drills (or even adapted egg beaters) were employed to drill holes into a variety of materials. Nowadays we’ve come to rely on using electric drills to accomplish seemingly basic tasks. Nonetheless, there will invariably be occasions where you may not have a drill to hand or you simply can’t use one due to power or environmental constraints.
This article provides a number of possible options for different types of materials and different outcomes when you don’t have a drill.
How to drill a hole in wood without a drill
There are various procedures that can be utilized to achieve this goal:
Method 1 – Chisel
Depending on the size of the hole, a chisel can be used. Usually for a larger hole the chisel can be used to cut away the material.
- Place the chisel perpendicular to the wood close to where the hole is needed.
- Strike the back of the chisel with a hammer creating a cut in the wood.
- Do this several times creating a circular channel in the wood.
- Tip the chisel at a 30° angle to the wood, strike it lightly to cut away the middle of the circle.
- Work the chisel around chipping away more material as needed.
- Repeat steps 1 – 5 until the required depth is reached.
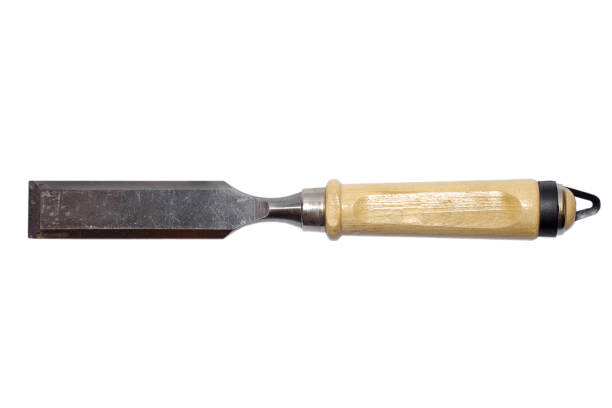
For thinner pieces of wood which require a smaller hole, a relatively small chisel can be used as a ‘drill bit’. Place the tip of the chisel on the spot the hole is required and turn it in a screwing motion (similar to using a screwdriver) to remove the material. This methodology is considerably easier on soft wood than hard wood.
It’s also worth bearing in mind, learning to use a chisel correctly to only remove the intended amount of material can take time and experience. In addition, chisels are not particularly good at making round holes.
Method 2 – Hollow Metal Punch
A metal punch can be used to make holes in wood, but it’s best used on soft wood (and thin-soft wood at that); for example, plyboard. Equally, due to the required force of the hammer blow for using the punch, this process works best using a small diameter punch.
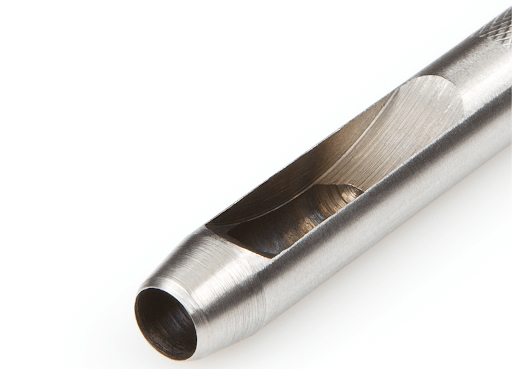
Method 3 – Burning
Creating a hold in wood by burning has been used for centuries. Ancient cultures burnt holes in the centre of solid pieces of wood to form canoes and to join wall posts to adjoining roofs.
The most efficient method for burning holes in wood is as follows:
- Choose a metallic rod of the appropriate diameter for the required hole size.
- File the end of the rod into point. This helps placement and passage through the wood.
- Heat the rod (remember to use appropriate safety equipment including heat resistant gloves!)
- Once the rod end is hot enough, push its point into the piece of wood.
- Spin and wiggle the point to increase burning speed.
- As the rod begins to cool, remove it from the wood and re-heat.
- Scrape away burned wood and try not to overly widen the hole.
- Repeat steps 3 – 7 as needed until the hole is created.
The benefit of this methodology is its low tech and is lower effort than using a chisel. Overall, it is less precise than a drill and will leave charring – which can be alleviated by sanding. Also, the process might take time to get the desired depth.
For smaller holes, tools such as a soldering iron or metal rod can be used. The soldering iron process is probably self-explanatory, although it is worth noting the limitations regarding the diameter and actual length of the ‘hot’ electrode part of the soldering iron.
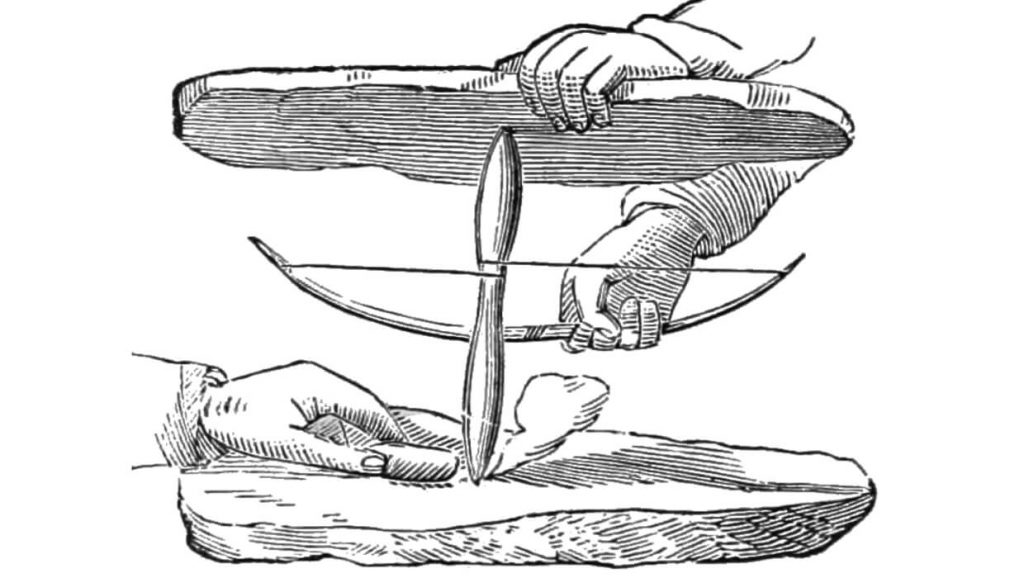
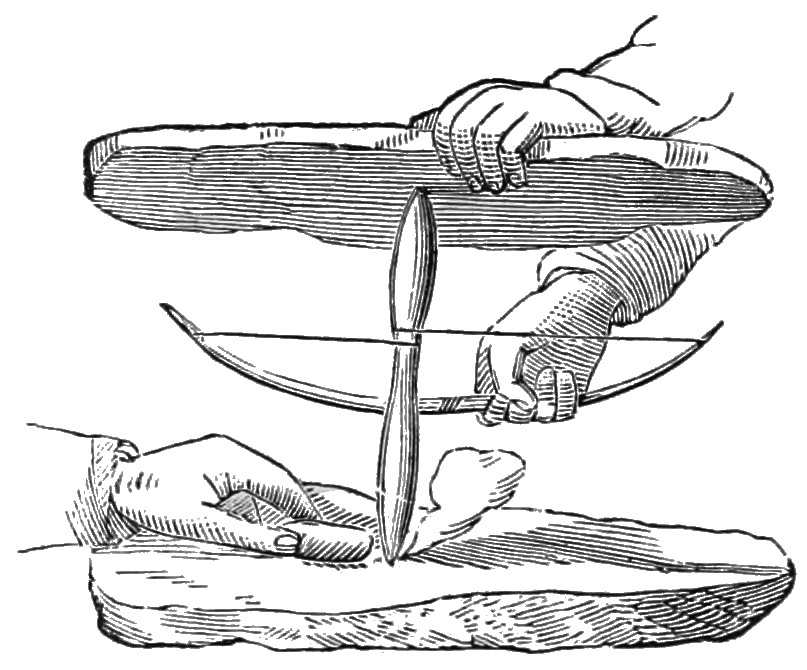
Method 4 – Bow drill
A Bow drill is normally used for starting fires rather than making a hole through wood but it should still be considered as a possible solution, if even not all that practical. The process is as follows:
- Tie a piece of string or cord onto one end of a flexible branch, into a ‘D’ shape.
- Bend the branch and tie off the other end keeping the branch taut.
- Get a straight stick, which we’ll call the “ember stick”, and wrap the cord of the ‘D’ shaped stick so it makes a revolution on it.
- Make a notch in the piece of wood where you want the hole.
- Place the ember stick in the notch.
- Put stone or another piece of wood between your hand and the other end of the ember stick.
- Push down while sawing the bow back and forth to create immense friction between the ‘ember’ stick and the piece of wood where you want the hole to appear.
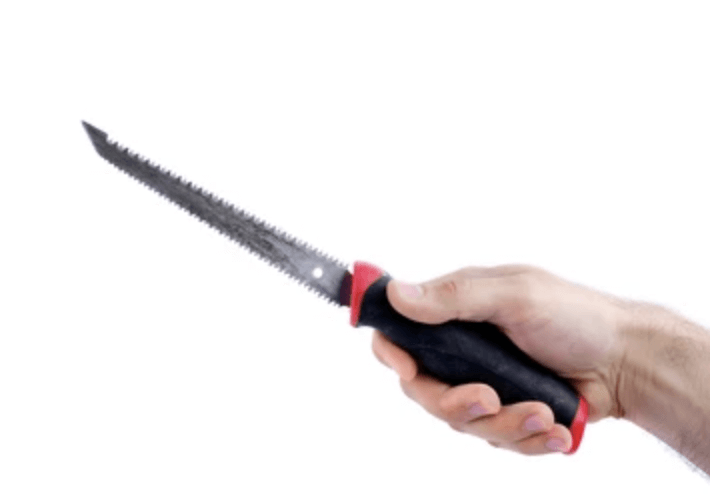
How to screw into wood without a drill
To begin with, you’ll need the following equipment:
- Hammer
- Screwdriver. When choosing a screwdriver, ensure its tip fits well into the head of the screw. The tip of the screwdriver should fill the recess completely. If you’re working on thicker pieces of wood, it is wise to use heavier screws to ensure better holding power. Screwdrivers, like the slot-head, vary according to the width of the tip as well as the shank’s length. Thus, choose a screwdriver with a tip that matches the screw head’s diameter. That said, Robertson and Phillips’s drivers have designated numbers. The greater the number, the heavier and larger the tip of the screw that it can drive.
- Small nail
Then follow these steps:
- Start by creating a ‘pilot hole’ (an initial small hole in the wood). The pilot hole will facilitate the screwing process, especially when working with hardwood. It helps keep the screw in place and in a straight position. It can also prevent the wood from splitting when screwing. This can be done by using a hammer and a small nail.
Care needs to be taken when the nail being used to make the pilot hole nail is extracted because, if removed abruptly, the wood may get damaged. Pliers to pull the nail straight out is probably the easiest method. However, if the nail is stuck, a claw hammer can also be used. A rag or thin piece of wood should be used to cushion the hammerhead to avoid damaging the wood.
- Place the tip of the screwdriver on the slot on the screw head first. Then, position the tip of the screw onto the pilot hole. Hold the screwdriver firmly, press down and turn it, driving the screw is driven into the wood. This should be done slowly, especially if working on thick wood, to further reduce the possibility of splitting the wood.
Continually ensure that the wood and item you’re screwing into are aligned and screwed together firmly. If it is hard to align the boards, use a clamp.
When is the right time to use a Screwdriver to screw into Wood?
Even if a power tool was available, there are times when the use of a screwdriver is more appropriate such as:
- When the use of power tools may be risky.
- When working in wet places or in places where water is present.
- When working with non-standard sized screws.
- When the use of power tools and electronic tools is impractical.
- If you want to work out your forearms.
How to make a Hole bigger without a drill
To make a hole bigger without a drill there are various options that can be employed. You can use a mandrel (appropriate diameter) and sandpaper, a hand file, or a jab saw. It is also helpful to draw the size of the required diameter first then manually file the excess wood until the hole is the correct size.
Method 1 – Mandrel and Sandpaper
- Attach coarse, grit sandpaper to an appropriately sized mandrel, using tape, rubber bands, or staple gun, ensuring the sandpaper is secure enough to create friction without slipping off.
- Rub the mandril and sandpaper up and down in all parts of the circle as necessary until the required hole size is reached.
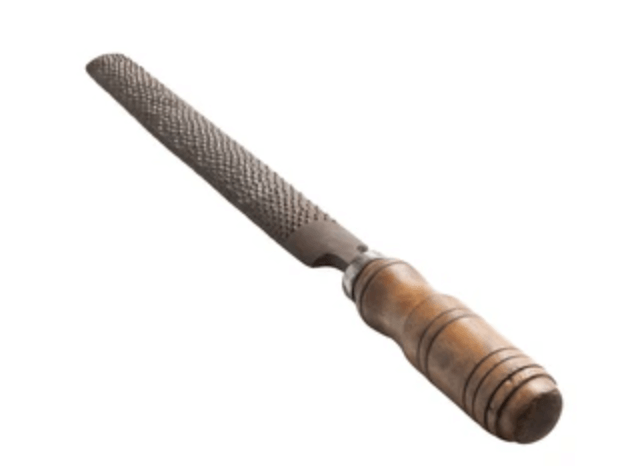
Method 2 – File or Rasp (Wood and other Materials)
If the sandpaper and mandrel system appear to be too slow, consider using a hand file or rasp. These files can shave away at a wide range of materials including wood, metal, PVC, tile, or even glass. They also come in a variety of shapes, with the most suitable option likely being one that is curved or cylindrical.
- Using a hand file requires no extra preparation. Place the file in the hole as far as it can go and start filing the material away.
- Keep filing in all parts of the circle until the required hole size has been reached
Method 3 – Jab Saw
These saws are used to cut drywall (and other applications) and have teeth pointed in 2 directions. Although the blade does taper, so can also be used to create smaller holes, this may prove fiddly and will likely require a significant degree of effort. For this reason, it’s best kept for use with larger holes.
The jab saw is not as straightforward as sanding or filing and is generally reserved for wood or drywall. Also, bear in mind that a jab saw will give a more chopped appearance, so you should consider pairing this technique with sandpaper to smooth out the hole once it is the correct size.
How to make a hole in metal (sheet) without a drill
There are several options how to make a hole in metal without a drill, although invariably this would involve making holes in sheet metal, as opposed to thicker pieces of metal.
Method 1 – Hole Punch Pliers
Hole punch pliers are relatively easy to use. They feature a pin at the end of the plier’s jaws, and when force is applied to them, a clean hole through a piece of sheet metal is achieved. To get the most accurate hole punch possible, the sheet metal should be measured and marked with a black marker or scribe. This will also help to ensure accurate spacing between multiple holes if required.
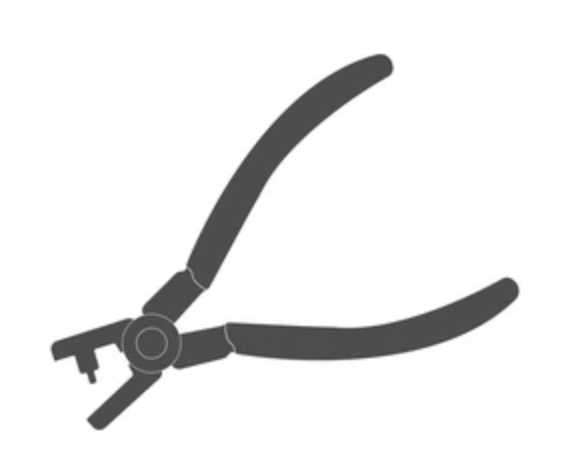
- Start by using a centre punch and hammer on a steel block to create a small dent where the metal has been previously marked. This will provide a guide as to where to position the hole punch.
- Punch the hole on the side of the sheet metal or blank that will face outwards. This will ensure that any sharp edges that are created will not be visible. The metal hole punch is quite accurate.
- There will likely be small burrs on the inner edge of the hole that has been punched. Using a forward and twisting motion, file the inner edges of the hole using a round needle or curved file to get rid of the burrs.
Method 2 – Hollow Punch and Hammer
A metal punch can be used to make holes in thin mild sheet steel, using a wooden block (not metal, otherwise the punch cutting edge will be damaged) and hammer. Due to the force of the hammer blow required when using the punch, this process really only works when using a relatively small diameter punch.
Follow the procedure detailed above at Hole Punch Pliers.
Method 3 – Hacksaw or Jeweler’s Saw
A hacksaw or Jeweler’s saw can be utilized to make larger holes in sheet metal, although the distance from the edge of the metal sheet to the required hole in it will be limited by the size of the saw frame. This method can also be used to create other defined shapes.
- Make a stencil by cutting out the same size hole or pattern that is required on paper.
- Carefully lay your paper stencil on the sheet metal and fix it in place using double sided sticky tape.
- Using a centre punch, hammer and steel block, place the sheet metal on the block and position the centre punch at a central point in the cut-out design. Tap punch with the hammer to leave an indentation on the sheet metal.
- Depending on the tools that are available, a small hole needs to be punched where the indentation was made.
- Take the saw blade from the saw frame. Feed the blade through the hole in the metal sheet.
- Reattach the saw blade to its frame.
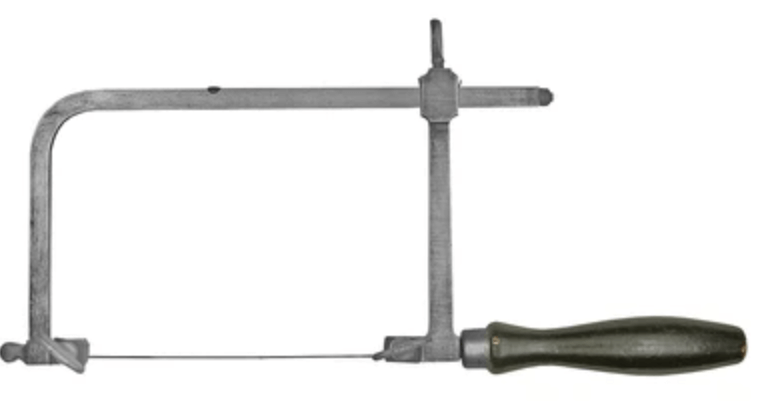
- Ensure the saw blade teeth to the frame are running in the right direction for cutting. Saw the hole or pattern by running the blade in slowly to begin with. This will provide a groove to make it easier to start sawing.
- Continue sawing in a downward motion, making sure the saw frame is parallel to the work bench.
- When finished, detach the saw blade from its frame and the hole or shape is ready to be lightly filed for a smooth finish.
Method 4 – Nail and Hammer
For very small holes, or holes ready to have a self-tapping screw (as opposed to a nut and screw) inserted, then as a final resort a nail and hammer can be used. Again this only really works on thin mild steel sheets.
- Measure, then mark the metal sheet with a black marker or scribe where the hole is required. However, rather than using a metal block, ensure there is a wooden block under the metal sheet where the nail is to be used.
- Hammer the nail (masonry nails are best as they are much stronger than normal nails) with the hammer then use pliers to remove the nail, which will likely be slightly stuck in the wooden block.
- Also, nail the hole on the side of the sheet metal or blank that will face outwards.
How to make a hole in glass without a drill
Depending on the type of glass, it can be challenging to make a hole without a specialized drill, particularly a small one. However, window glass can be cut with a diamond cutter and then (gently) punched, but only in thin glass (perhaps circa 3mm) and a diameter circular opening of circa 25mm or more. Smaller holes cannot be made this way.
- Measure and mark (black marker pen) where the score is to be made. If you’re just cutting the glass, then the score must run from one edge of the glass to the other edge. The cut should not be very long. Scores longer than 600 mm have a high failure rate when breaking.
- Dip the cutter in the oil and grasp it like a pen (an oiled cutter creates a smoother score line). Apply pressure to the glass and you pull the cutter along its surface.
- Listen for a smooth sound; a gritty sound means there is too much pressure. Arguably, the less sound that is made, the better the score will be. Pushing too hard (a common error) will result in the glass snapping.
- A uniform score is required; do not run back and forth over the line if a spot is missed. The score should be barely visible and look like a small scratch, nothing more.
- Apply minor pressure to the glass along your score, through wrists rather than elbows. This should be done a number of times around the score. When the glass begins to break, it may simply start as a ‘run’. If it only runs 25 mm or so, apply a little more pressure and it will continue to run.
- Score around a circular (or otherwise) template which is strong enough for the cutter to trace around.
3. Use fine sandpaper or a sharpening stone to remove any sharp edges. Not only does sanding reduce the chances of being cut, but sanded glass is less likely to chip along the edges and has some added strength.
Alternatively, to make a small hole, circa 3mm, in something like a bottle, soak a circular piece of string in kerosene, then place it where the hole is required. Apply a match, wait a short while and give the area inside the burning string a tap. The piece of glass should pop through. This methodology can also be used to cut a bottle into two pieces, although due care is required to ensure the bottle does not simply break into several pieces.
How to drill a hole in a rock without a drill
For normal pieces of rock or stone, then an appropriate drill is required; however, if the rock is very thin, and reasonably large like a pane of glass or tile (very, very rare), then arguably a glass cutter could be used, as detailed above.